Your Cook shed holds many possibilities! But, don’t discount what you can do with the outside of your shed as well as the inside.
During warmer months, there’s many ways you can incorporate your shed into your landscape. But, during the winter holidays, don’t forget to include your shed when you’re decorating!
This do-it-yourself project is part of our Yuletide DIY series. If you missed a post this holiday season, check them out here!
{{ script_embed(‘wistia’, ‘j3h8ysbqdz’, ‘undefined’, ‘responsive’) }}
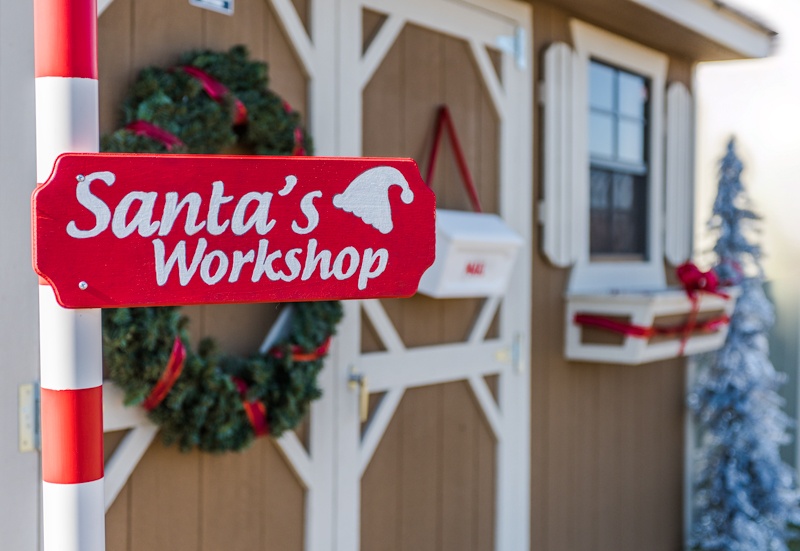
We decided to transform the outside of our shed into Santa’s workshop! If you’re having kids over for holiday parties, invite them to leave mail for Santa in the decorated mailbox. It will be fun for kids and parents alike.
We only touched the outside, so no one has to peek inside to see your storage or wood working space. Simply decorate the outside to go along with the theme of your home and yard.
Here’s our instructions (plus videos!) of how to convert your shed into Santa’s Workshop:
In addition to an outdoor, prelit Christmas tree, a wreath for the door, and a little extra ribbon, here’s the Yuletide DIY extras that we added to the shed.
Finished Products
-Santa’s Workshop Sign
-Holiday Themed Stepping Stones
-Mailbox for Letters to Santa

Supplies (Spent approximately $100):
- PVC Pipe – 2 in. by 5ft.
- PVC 2 in. Cap
- 16 in. Green Plastic Planter
- 50 lb Bag of Play Sand
- Blue Painters Tape
- (3) 11 in. Red Square Stones
- Red & White Exterior Latex Acrylic Satin Paint
- (1) 2-in. Brush
- (2) Crafting, Thin Brushes
- Foam Brush
- 6 x 17 in. Wood Plaque
- Paper Plastic Drop Cloth
- Self Drill Screws 1.5 in. (5 count)
- 2 Spools of Red Wired, Plastic Ribbon
- 1 Hanging Plastic Mailbox
- 2 Printables:
- Carbon or Transfer Paper
- Pencil
- Electric Drill (already had)
Santa’s Workshop Sign DIY Instructions:
Striping the pole:

We painted our pole (instructions below), but you may decide to simply wrap it in outdoor red ribbon and secure with a hot glue gun.
- For best results, you may need to sand down the pipe just a little bit so the paint sticks a little easier.
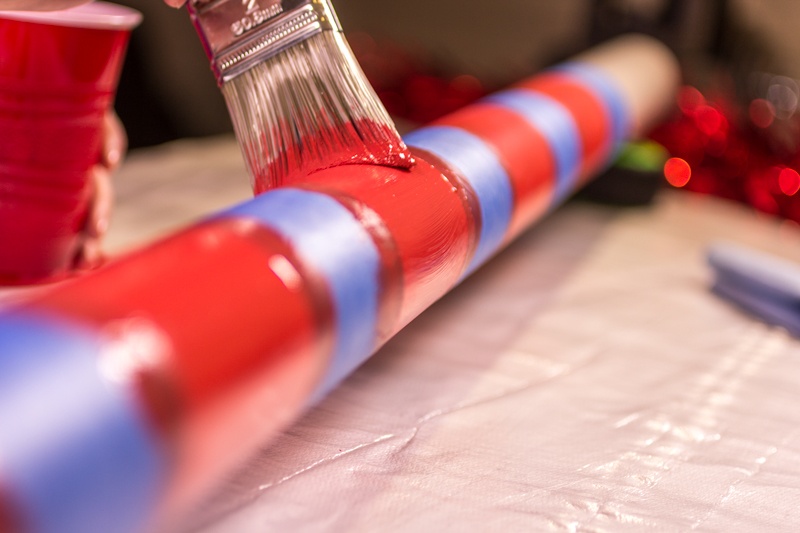
- Take the long pvc pipe and measure every four inches. Then, tape it off. This will make four inch red and white stripes. Measure the height of the planter and then take that measurement to help you mark where you need to begin your stripes on the pvc pipe. This just saves you a little extra time from having to paint the entire pole.
- Then, paint red in between the tape. After it dries, you may need to do 3-4 more coats. If it’s in the sunlight, it will dry pretty quickly.
- Once finished, you can peel the tape off slowly to reveal clean painted lines.
Creating the Sign:

This was so fun to make! You can use this technique for anything you want the sign to say. We chose “Santa’s Workshop.” Find the template here!
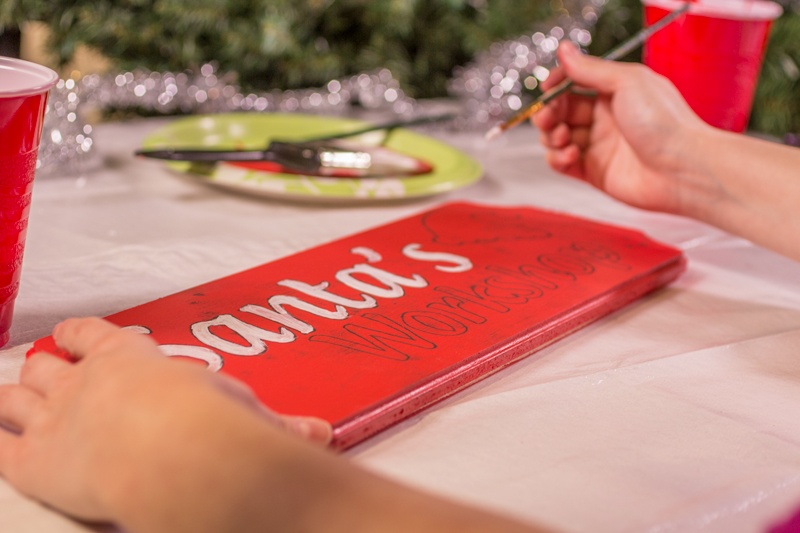
- Paint the plaque red and let dry. We did three coats.
- Use carbon paper to draw your design on the wood (here’s our Santa’s Workshop template). If you love to craft, carbon or transfer paper will become your new best friend! It’s simple to use and you can reuse the same page on multiple projects.
- After your design is transferred to the wood, use your small crafting brushes to paint white inside the lines. Try to use long, steady strokes for the best results. You’ll want to paint at least two coats.
- Once it’s dry, measure at least one inch from the left side and place a strip of blue painters tape vertically on the sign.
- Then, measure at least one inch from the left side and one inch from the top and make a mark. Then, at least one inch from the side and one inch from the bottom and make a mark. These marks will note where your drill hole will go.
- Use a smaller drill bit than your screw. Drill straight through the wood on the marks you made. The painter’s tape will help keep the finish and wood intact.
- After you’ve drilled your hole, line it up on the pole where you want it. Have someone hold it in place while you drill the first screw through the drilled hole and into the pvc pipe pole. Then, do the same on the bottom of the wood sign.
- When you get the planter and sign placed where you want it outside by your shed, have someone hold the sign in place as you pour around it until it is secure. You may want to fill about two inches in the bottom before putting the sign in.
Holiday Themed Stepping Stones
{{ script_embed(‘wistia’, ‘ddwaz5porq’, ‘undefined’, ‘responsive’) }}
This is such a fun project to get the whole family involved with! Make it a fun crafting afternoon by getting each family member to create their own stepping stone.
Add to the festivities with some holiday music and hot chocolate. While the stones dry, enjoy a snack and admire each others’ creativity.
- Depending on the color stones you buy, use the red and white paint to decorate them however you want! You can have each person do their own design. Or you could all add your handprints to them. The possibilities are endless.
- Be sure to have each person add their name and year on the side so you’ll always remember this fun day together.
- In the spring, you could always do another craft day where you create stepping stones to be used the rest of the year.
Mailbox for Letters to Santa
{{ script_embed(‘wistia’, ‘d7jwnl04j8’, ‘undefined’, ‘responsive’) }}
Whether you have a business in your shed, or it’s just a storage space, you can add this fun mailbox to your door. You can even encourage your friends and family to use the mailbox to mail letters to Santa! Increase the holiday fun, by writing letters back to the kids.
- Get that transfer paper out again and trace this template onto the plastic mailbox.
- Then, paint over it with red paint. You’ll need your thin crafting brush for this project.
- Add some ribbon to the mailbox to hang on the door. For an added touch, put a bow on one side of the mailbox.
These are simple projects to get the family involved with and will transform the outside of your portable building this holiday season. You can add a wreath, outdoor tree, and lights to make your shed really stand out this holiday!
If you’re looking for other ways to decorate your yard or prepare for all those holiday parties, check out the rest of our Yuletide DIY series! Learn how to create simple $3 hostess gifts, or use plywood to create a nativity scene for your front yard.
Are you still trying to convince your spouse you need to add a shed to your home and landscape? Download our free presentation to help you get the conversation started and based on the facts! Download it by clicking below!
{{cta(’79b69bc6-0d8f-48c9-9d8e-a9e3353481f9′,’justifycenter’)}}
